
Teaching in Microsoft Teams
At Conestoga, some Faculty may use Teams to teach their courses. This post aims to support you in the initial stages of learning to use Teams to teach.
What is MS Teams?
Microsoft Teams is a video conferencing tool, and a integrator for a number of communication and collaboration functions. It can be used to message individuals or teams at the college, and to host meetings online.
The video below introduces the key features offered by Teams. Due to the hosting of this video and others made by Microsoft, we are unable to embed this video in this page for easy viewing.
Video: Microsoft. “What is Microsoft Teams?” [0:55]
Sign In to Teams
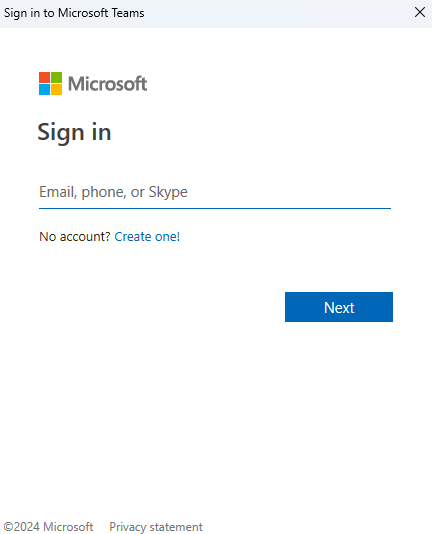
Creating and hosting meetings, as well as other functions within Teams are best accessed within the installed program.
Access instructions on how to download and install Microsoft Teams on our Download Office 365 page. You’ll need to sign in with your college email and password during this process.
Schedule a Teams Meeting
To create a meeting link for your class, schedule a meeting using the New Meeting option in the Teams Calendar.
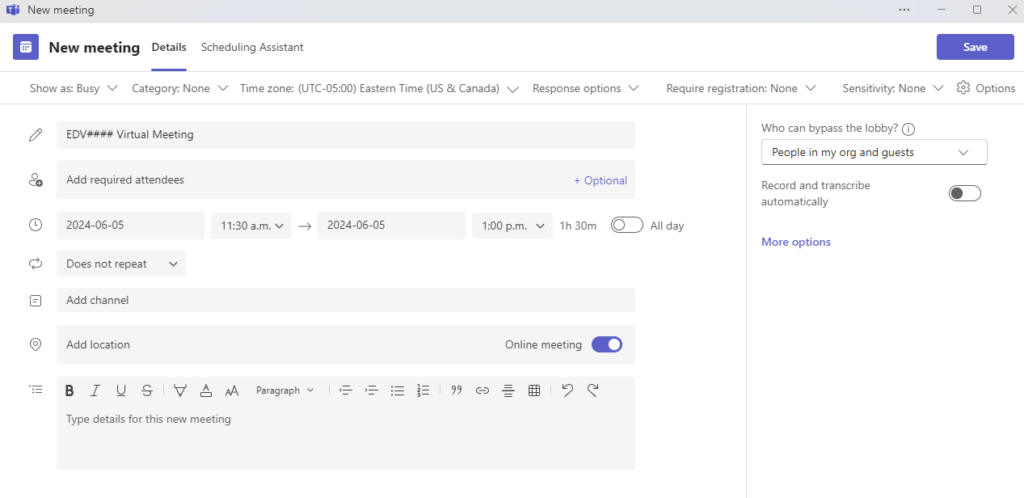
- Give a title to your virtual meeting. Include your course code so your students can easily identify their class meetings.
- Set up the time for the first occurrence of your meeting, including the date, time, and duration.
- Change the recurrence setting to reflect how your meeting schedule reoccurs. You will likely set this option to Weekly, which will open a Set Recurrence menu.
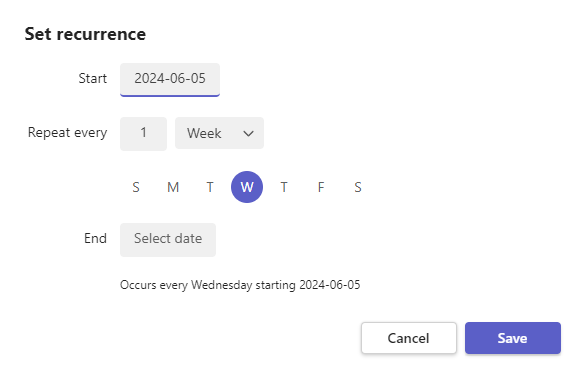
- In the Set Recurrence menu, choose which days the meeting will repeat on. Note that if you have a meeting that occurs on more than one day, at different times of the day, you will need to schedule a separate meeting for each of the occurrences.
- Set the end date of your final class, to prevent it from repeating indefinitely past the end date of your course. Select Save when your recurrence is set successfully.
- If there is any additional information you would like your students to have accessible with their meeting calendar item, you may use the Details box to add additional comments.
- In the right bar, you may set which of your participants can bypass the lobby. The lobby is similar to the Waiting Room in Zoom, which allows participants to congregate at the beginning of a meeting and be let in by the instructor.
- In the top bar, select Response Options, and set turn off the options for Request Responses and Allow Forwarding. This will prevent an overwhelm of notifications, and prevent students from forwarding an invitation to any other students.
- When you are satisfied with the settings of your new scheduled meeting, you can click Save to complete the process.
You will now be able to see your newly created meeting in your Teams Calendar!
Learn more about scheduling meetings in Teams.
Post Your Teams Meeting Link in eConestoga
Once you have generated your meeting link, post it in your course. Some people use a module, but often the best way to post your link is as a calendar event. This takes advantage of a specialty tool, developed by the Online Learning Center, which directly adds them to your course home page.
The Online Learning Center. “Adding Zoom Links to Calendar.” [3:26]
The video provided below describes these steps as they relate to sharing Zoom links, while the process is identical for sharing Teams meeting links in eConestoga.
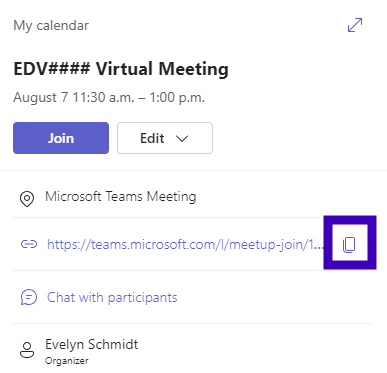
To find your Teams meeting link, select your meeting in the Teams Calendar and copy the link that is shown here.
Host a Class in Teams
These basic hosting skills should get you through the early days. This video covers checking your video and audio, managing participants, the chat and screen share, taking recordings, breakout rooms, reactions, and feedback.
Video: Microsoft. “Tips for Teams Meetings” [2:18]
Before class, make sure you review your PowerPoint presentations to make sure they’re accessible. On the day of class, cue up your presentation and start your meeting. Avoid locking meetings, as students may come late.
It is recommended that you record all class sessions held via Teams. You can use the recording to review your delivery, as evidence of what was shared with students, and you can also share the recording with students absent due to illness or emergencies. If your Chair requests that you record and post each class session, then do so. In some areas, this is the best way to support students.
Manage Breakout Rooms
Breakout rooms offer flexible options for discussion, interaction and collaboration in Teams. You can monitor students indirectly in these rooms, using the participant view of the breakout room menu, the breakout room chat windows, and collaborative docs in OneDrive.
Learn more about creating and managing Breakout Rooms in Teams.
Share Your Recording
Recordings can be shared in Teams using the Stream app, which is available within the Teams installed program. During a meeting, select the “More option” in the toolbar, and under “Record and Transcribe,” select “Start Recording” to begin recording your meeting.
It is recommended that you utilize Panopto to host and share your Teams recording once it has been created. This is because recordings created on Teams are only held for a short period of time (~3 weeks), whereas Panopto-hosted videos will be held indefinitely for sharing and editing.
For more information on setting up Panopto with your course shell, see our support article introducing Panopto.
To access and download a recording after a meeting is complete:
- Wait for the recording to process and become available to your Teams account. This may take several minutes to complete.
- In the Teams program, find the leftmost toolbar and select the “…” button. Open the Stream app.
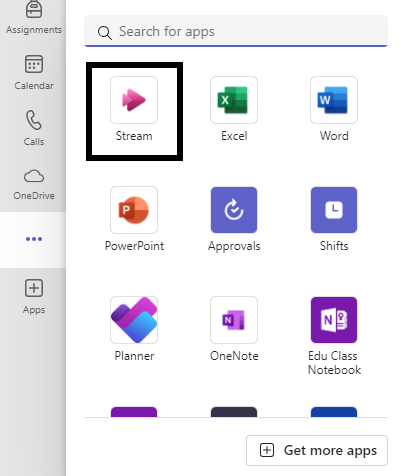
- In the Stream app, you will find all of your recordings created in Microsoft teams, as well as videos that have been shared with you over Microsoft Outlook. To narrow down results to your recordings of virtual meetings, select “Meetings” in the filter options.
- Under the additional options next to your recording, select Download. This download will be available in your computer’s default Downloads folder.
- If you receive an “Access Denied” webpage, select the option that allows you to sign into your Microsoft account. When you do so, the download will resume.
To upload and share your recording:
- Navigate to and select the Panopto access link in your course shell.
- Choose the folder you would like to have your recording uploaded to. Select Create > Upload media
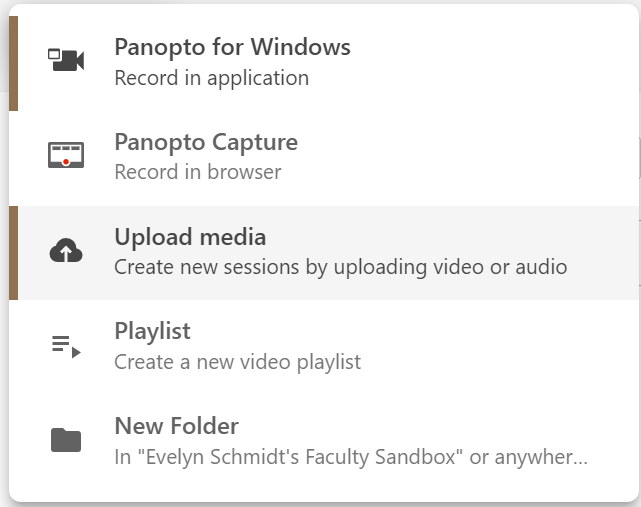
- Choose the recording from your Downloads folder. When it is done uploading, you can close the window.
- After you’ve finished uploading your recording, you can share it by embedding it in eConestoga or by sharing a link. This video explains how to share video content in eConestoga.
eConestoga Support. (2022). Panopto – Share Video Content in eConestoga [Video]. Panopto.


