Building tests, managing version numbers, sequencing question orders, aligning answer keys—all of these parts of test construction can drain hours and hours of precious faculty time. Sure, there are several tools available to Conestoga faculty to address these issues in a Learning Management System (LMS) like eConestoga, but what about for pencil-and-paper, in-person tests? Let’s consider a simple scenario:
A nursing faculty member is preparing for an in-person final exam in one of their courses. Because of the volume of students in their class, they want to ensure students who are seated next to each other are given unique versions of the test with different question and answer sequences for each version.
How might they proceed?
Well, they could certainly do it all by hand, manually tracking every change from one document to another, and all for the sake of reordering and reformatting the questions that they’ve already spent so long developing. This process is not only tedious, but it’s prone to errors that can quickly snowball into more work for you down the line. Fortunately, with the guidance of faculty here at Conestoga, we’re proud to present a simpler, easier solution in the form of a single Microsoft Excel file.
Introducing the Tool
Our new Conestoga Exam Question Manager isn’t a fancy application or software you have to download—it really is just a spreadsheet with buttons. Still, we want to make sure that we’re not simply replacing one headache with another, so let’s dive in.
What the Tool Does
What the Tool Doesn’t Do
Randomize Test Questions & Answers Export Test-Ready Word Documents Generate DataLink-Compatible Answer Keys Organize Various Question Types
Multiple-Choice
Multi-Select
Multi-Select
True/False
Images
Generate Test Questions & Answers Create Test Cover Pages Organize Other Question Types
Short-Answer/Essay
Matching/Sorting
Step 1: Initial Setup
Here’s what you need to do to get started:
Download the latest version of the Conestoga Exam Question Manager to your computer. Note: The tool does not work from the browser version of Excel.
Open the file.
Along the menu ribbon, a pop-up may appear that references “macros”. Macros are multi-step computations that the buttons will use to process your question library. If you see the option, select “Enable Macros“. If not, complete Steps 4–7.
Along the top of the ribbon, select File, then Options (under More…on smaller screens)
Under Trust Center, select Trust Center Settings.
Under Macro Settings, select “Enable VBA macros“, then select OK to close the window.
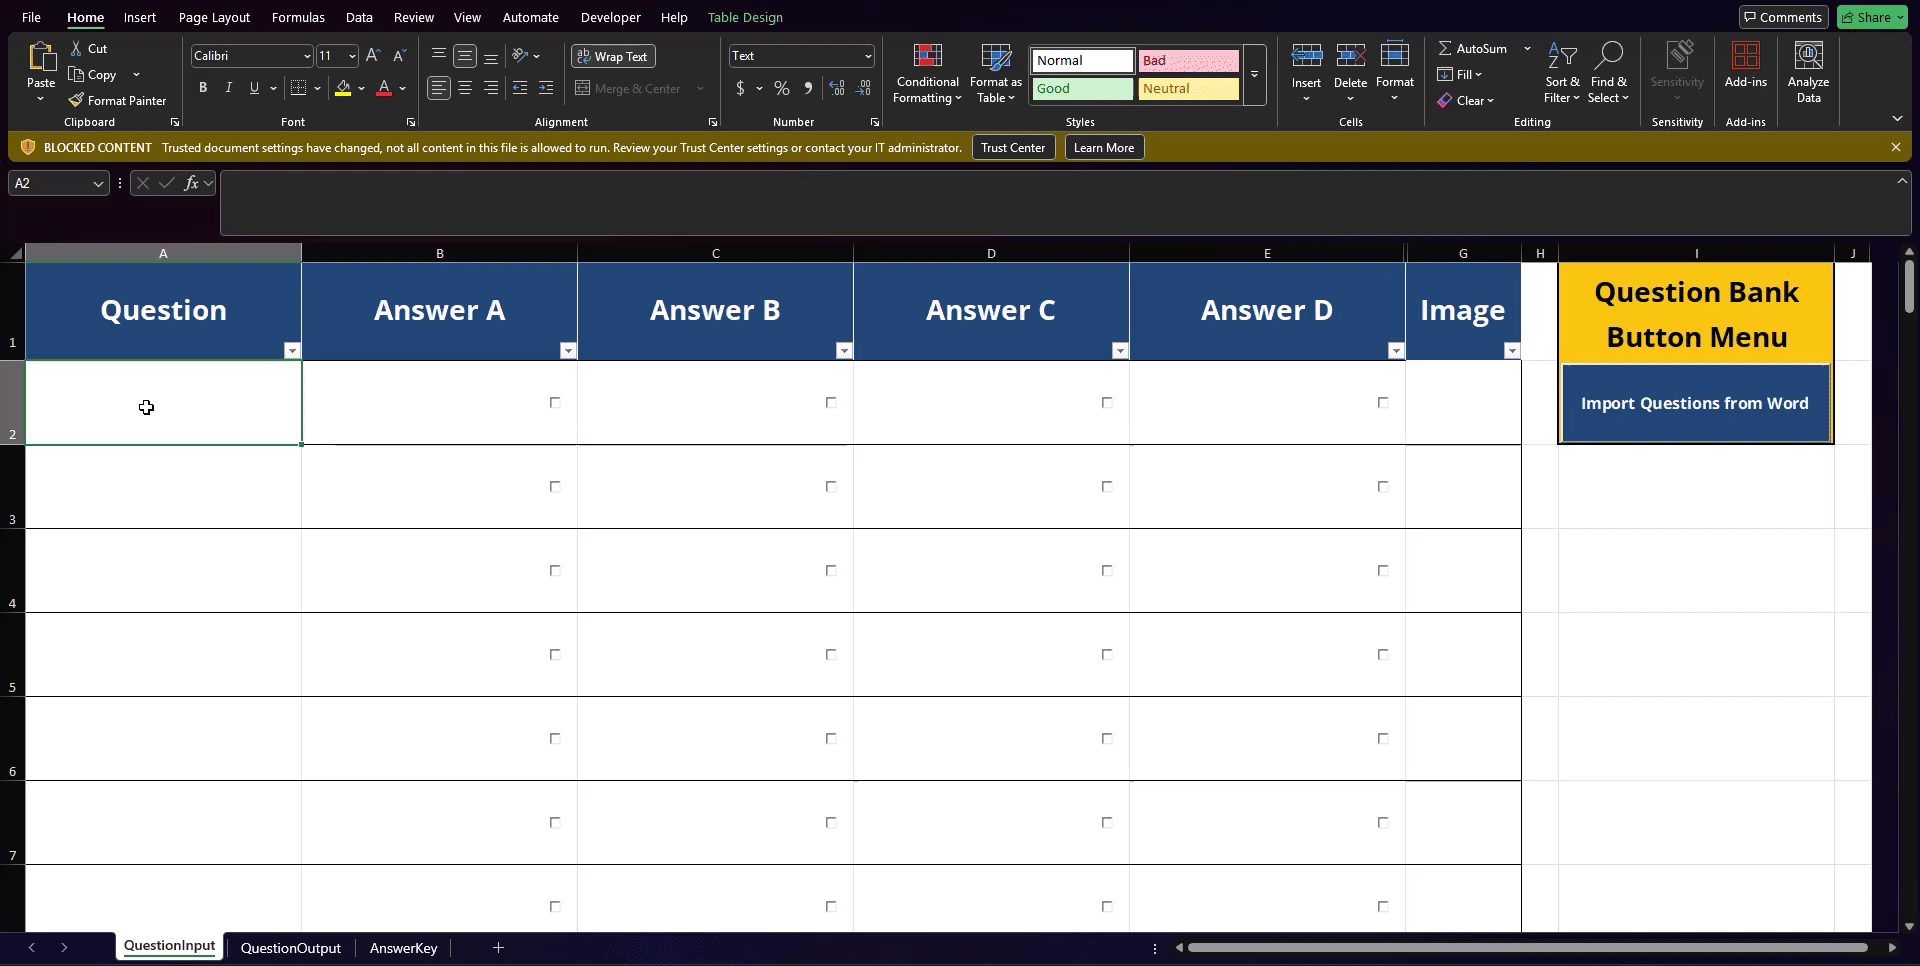
Now that you’ve completed the first-time setup, please take a moment to familiarize yourself with the 3 worksheet tabs found in the bottom left of the window. If you can’t see them right away, click on the ••• icon button to reveal them.
Step 2: Import Your Questions
There are 2 methods you can use to add your questions. Option 1 is to import from an existing Word document, while Option 2 is through manual import. I’ll outline both methods below.
Enter your answers into Columns B–G to correspond to the question in Column A.
Repeat Steps 1–2 as required.
Note: For ease of use, you may wish to include all correct answers for each multiple choice question in Column B, as long as you remember to at least randomize the answer position in Step 4.
Note for Images
If you wish to add images to your test, please follow these instructions:
Select the image you wish to assign to this question, then select OK to confirm your choice.
Select the cell in Column G that corresponds with the question where you’d like to add an image.
In the ribbon under the Insert tab, select the Pictures drop-down menu.
Select Place in Cell, then select the picture source of your choice.
Step 3: Build Your Answer Key
Once the questions have been imported, you’ll need to identify the correct answer for each question by adding any non-white fill colour to that cell. These selected answers will be used to generate an answer key in the AnswerKey worksheet. Like above, you can accomplish this through one of two ways or a combination of both.
Double-click the checkbox in that cell to identify it as correct in the answer key.
Note: This feature may not work on all devices. If the background fill colour for the correct answer cell doesn’t change when clicked, please use Option 2 below.
Select the cell that contains the answer you want to identify as correct in the answer key.
In the ribbon under the Home tab, select the Fill Colour icon to add a fill colour or its companion drop-down menu to custom select a colour.
Note: Only a single fill colour can be used for correct answer identification. Please be consistent in whichever colour you choose.
Step 4: Sort Your Questions
Once your questions and answers are stored in the QuestionInput worksheet, navigate to the QuestionOutput worksheet to continue to manage your question pool. Once you arrive, you’ll find several buttons to choose from, each with a slightly different function. Your welcome to click each button as many times as you wish!
Button
Function
Keep BOTH Question & Answer Position
When clicked, this button will transfer over all questions and answers with an identical sequence to what was inputted in QuestionInput.
Randomize ONLY Question Position
When clicked, this button will transfer over all questions in a randomized order, with answers kept in the same sequence within each question as provided in QuestionInput.
Randomize ONLY Answer Position
When clicked, this button will transfer over all questions in the identical sequence as provided in QuestionInput, randomizing the order of answers within each question.
Randomize BOTH Question & Answer Position
When clicked, this button will transfer over all questions in a randomized order, randomizing the order of answers within each question from what was provided in QuestionInput.
Step 5: Export Your Results
With your question and answer sequences generated, all that’s left is to export the results into a usable format. Fortunately, there are buttons for that too!
Button
Function
Export Questions to Word
When clicked, this button will export all questions and answers in their current sequence in QuestionOutput into a new Word document in the same folder as this Excel file.
Export Answer Key to CSV
When clicked, this button will prompt you to either: (a) export all questions and answers in their current sequence in QuestionOutput as a new CSV file in the same folder as this Excel file or (b) ask you to select an existing CSV file to add the current answer key to it.
Step 6: Prepare Your Test
The final step is to add the put the exported results into action. We’ll start with the Exam Questions Word document before finishing up with the answer key CSV in DataLink Connect.
Add Questions to Test
In a Word document, create a cover page including general test information such as:
Program
Course Code
Course Title
Test/Exam Number
Semester
Instructions for Students (e.g., question volume, time allowance)
In the Exam Questions document, select all its contents (Windows: Ctrl + Shft + A; Mac: Cmd + Shft + A), then copy them to your clipboard (Windows: Ctrl + C; Mac: Cmd + C).
With your cursor positioned at the end of your cover page, under the Insert tab in the ribbon, select Page Break.
Finally, paste the contents (Windows: Ctrl + V; Mac: Cmd + V) into your Word document.
Import Answer Key
When you’re ready to begin marking, open the DataLink Connect application.
Under the File tab, select Create Key.
From the “Form number” dropdown menu, select the appropriate test number from your DataLink sheet (Common Test Number: 20420).
Under the Multiple Key Selection panel, select the number of answer keys you wish to use (up to 4).
Select the Import from CSV button, then select the answer key CSV file you wish to use.
Select Send to Grid to apply the answer key to the test results.
Now you should be all set to run your test! Not only that, but next time you want to make changes to your questions, all you need is a past copy of the test to import the questions, create an answer key, and you’ll be primed and ready to make changes for the next version of the test in a matter of minutes.
Share this Teaching Tip
Graeme Noble
Graeme Noble, M.Ed (Curriculum & Pedagogy), has ventured into many realms of learning design to meet the needs of today’s professional learners—especially when it comes to educational technology. As an Educational Technology Officer, Graeme approaches teaching and learning at Conestoga and elsewhere from a digital storyteaching lens, always careful to consider how curricula and technologies interact to shape the learning environments and experiences.